Wednesday, November 14, 2012

Two Down and Two to Go....Well, Almost.

The piecing of Quilt #2 --for Daughter #2 is getting close to completion.  I chose a simpler pattern and more subtle colors for this quilt, based on the recipient's personality.  The pattern was FREE from www.modabakeshop.com.  The quilt is named, "Wiggly Whimsy", designed by Rebecca Silbaugh of Ruby Blue Quilting Studio.

So here we go with some photos--

Seven panels will be connected with gray background sashing


Closer view.  Fabric used, Basic Gray's Black Dress with spikes of color by Kaffe Fasset

Easy pattern

My first quilt is very bright and modern.  This second quilt is more subdued.  I wanted to make this quilt special in some way.  I find that the choice of backing can add an element of surprise or
"zip" to a quilt.  I searched the online fabric shops and our local fabric shop to find the perfect backing for this quilt.  And I know I have found it!   

Here it is--


As you can see, this is "Poppy Lane" by Timeless Treasures
A news print in black, white and red--perfect for my quilt!

Love, love, love the graphics


I think it adds that "snap" needed for this quilt, don't you?


Other stuff:

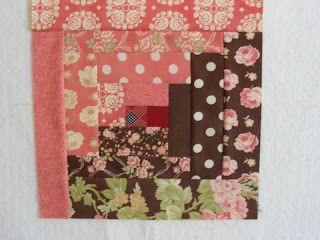
Please take the time to visit www.Quiltinggallery.com and read about the Sandy Quilt Block Drive.  The drive asks quilters to volunteer to make one or more log cabin quilt blocks (to certain specifications).  The blocks are easy to construct from  your scraps.  I have made two blocks and they are almost done--just need to add the last row of a solid, dark fabric.

Log cabins blocks for Sandy Quilt Block Drive:


See, you can use any of your scraps and make it colorful!

Have a joyful day and add color to our world with lovely quilty projects.

Sunday, November 11, 2012

Spring in November


I am still getting used to the seasons in Las Vegas.  I lived in S. California for twenty plus years and had the best weather in the world.  Now I am living In Las Vegas and there is a change of seasons.  But the seasons are are skewed.   Throughout the summer plants and flowers alike go dormant to survive the hot desert temperatures.  The 100 plus degree temperatures start in June and usually end in October; so it is a long, hot summer.
It is November and we are experiencing a rebirth of our garden and flowers.  Our roses are blooming, our vegetables sprouting and the desert cactus and succulents are growing.  It's almost like having a second spring!  This wonderful weather won't last long, though.  The weather forecast shows that cold temperatures are imminent.

Here are some snapshots of our new growth:

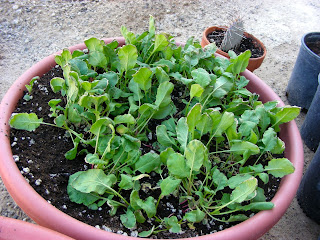
Our radishes already need thinning

Our peppers are abundant


The roses are in bloom

Propagating new cactus plants


Bountiful harvest of pomegranates


And lastly, our beloved kitty is growing back her fur coat.  She had a cancerous growth removed from her side about a month ago and it is so encouraging to see her healing.

Sofia is recovering from her surgery.


Here is the guy who makes all the magic happen in our backyard.


My husband, Tom


Some current projects--


November BOM for the "Breakfast Club" at Quiltique

Various projects
Paper Piecing project


Also, happy Veteran's Day to all those who have served our country, including my departed father in World War II, my husband in Viet Nam and my brothers, Bob and Ken for their military services.  

Have a happy week!


Saturday, November 3, 2012

What I did on Saturday...

I am really feeling the heat, so to speak.  I have four quilts still to be done, one mini quilt for a swap and a bunch of pillows to be finished by Christmas.   I feel like one of those gerbils on a wheel--running fast but getting nowhere.
Here is what I have accomplished today:


This little block is for a swap.  I have never participated in a swap before, but thought it might be nice to be an active blogger, rather than just an observer.
This needs to be completed by November 20th.
I am having fun with this.


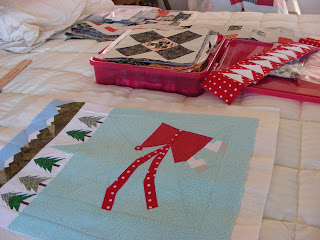
This is a paper piecing project.  The mountains are done--tomorrow the trees.
Paper piecing is fantastic!  Oh, the things you can make with fabric...


The backing fabric came today for my quilt #2.  It's perfect for the quilt design.  Photos to come.

Wednesday, October 31, 2012

One Down, Three to Go

Christmas is coming quickly.  My "Plan" is to make a quilt for each of my four children for Christmas this year.  When I made this "Plan",  I had about 6 months to accomplish it.  Fast forward to the very last day of October 2012... Quilt #1 is pieced.   On my last post, I showed you a sneak peek of one of the blocks for Quilt #1.

Yippee!  Here is Quilt #1:


Quilt #2 is in progress.  Me and Bernie are spending hours together!

Wednesday, October 24, 2012

My Little Pretties


Here are two of my favorite pieced quilts.  I am working on the backings for them.  I just love all of the color and cannot wait for them to be completed.

Tuesday, October 23, 2012

Little Deviations

The holidays are coming and my goal is to make a quilt for each of my children--that would be four quilts.  This goal is a bit ambitious, but achievable.   So then, why am I serendipitously deviating from my goal by starting other little projects?  I just cannot resist trying new projects and the blogs are filled with the most tempting photos and ideas for new creations.

Here are several "little" projects inspired by two free patterns offered on the blogosphere and one purchased pattern:

I am intrigued with houses and found this free pillow pattern of a little town square.  It's not finished.  I have decided to make this the center of a larger quilt, but I am not sure where to go from here.  Any suggestions?  Anyone?

This is a free downloaded pattern -- a  Full House pattern, Tiny Town pdf.  
Unfortunately, I cannot locate any additional info to give credit where credit is due for this pattern

Here is another free house pattern.  I thought about embellishing the houses and adding other objects to this neighborhood, but decided not to because I like the simplicity of the pattern.    So this is what it is,  and it will be quilted and used as a throw for cooler evenings.  (Yes, even Las Vegas has cool winter evenings.)


This free quilt pattern is called "Neighborhood Charm",  created by Debbie from Esch House Quilts.  The recipe can be found at the Moda Bake Shop.


This is a pattern that I purchased
When finished, it will probably be given as a gift to someone.


After these creative deviations, I am now "back on track".

Here is a little glimpse of the start of a quilt for one of my daughters:


More to come....    Meanwhile, have a creative day!


Friday, September 28, 2012

Rag Quilts and AccuQuilt Go Machine

Rag quilts are fun to make--especially for children because they are easy to sew; sturdy enough for multi-launderings; and the soft, warm flannel appeals to the kids.  I have a lot of fun making these quilts for my young granddaughters.  There are so many colorful children's fabrics.  At first I made my rag quilts with only flannel, but lately I have been mixing both 100% cotton and flannel.  This allows me even many more fabric options.  

The most time consuming and tedious part of making a rag quilt is the final act of snipping all of the seams and borders.  The first rag quilt I made, I used my regular sewing scissors.  Not only was this difficult but painful--my thumbs had blisters by the time I was done.  Luckily, the quilting-blog world offers the most helpful information and a short search told me that I could buy snippers to "snip" my seams.  Boy, they really do make the snipping absolutely easy (and painless)!


When attending one of my Block of the Month classes at the local fabric store, the The AccuQuilt! Go Cutting Machine was demonstrated and received high praise for its precision and time-saving factor.
I had only a passing interest in the machine and thought little more about it until I discovered that AccuQuilt  offered the 8-1/2 inch; Rag Square die.  I thought, "wouldn't it be fantastic to NOT have to do any final snipping of the seams?"

Now I am the proud owner of an AccuQuilt Go! Cutting Machine with the aforementioned 8-1/2 inch Rag Square die.  (The decision to purchase was not that quick and simple--after all it takes a lot of self talk to justify the cost versus the time-saving factor when you are retired.)

Now that I have used my cutting machine and rag square die to make the latest rag quilt I thought I might share my experience using it with anyone who is interested.  

I made the quilt with flannel and 100% cotton.  The cutting machine directions said, for flannel, cut the maximum of two layers at a time.  For cotton, it was recommended that you start with two layers and build up to six layers.  I found that I could cut 4 layers of the flannel quite easily and accurately.  The cutting process took some planning so as not to waste fabric.  I cut 9 inch squares to make my rag cuts.  You might say, "what's the point, why use a cutting machine if you have to do pre-cutting?"
Well, it's about the entire process--remember you don't have to do all that snipping later on.

And, the resulting rag squares were beautiful to behold--with lovely, perfectly formed, perfectly spaced fringes.  Sigh!


Layering the fabric into little sandwiches was easy peasy.  I placed 6 inch squares of white flannel between my fringed  8-1/2 inch squares ....


                                       and sewed an "X" across each sandwich square.


Then I sewed the sandwich squares together in rows.


All so easy, yes?    Well, no because when I turned over my sewn row of squares here is what I saw.

Peekaboo fringes


And this......

Helter skelter fringes


I found it very difficult to manage those gorgeous, long fringes.  Even though I ever-so-carefully pinned and sewed, they seemed to have a minds of their own--popping out and turning up where they were not meant to be.

Another challenge was sewing the rows together when four seams intersected.    The dilemma was--how to sew through or around the intersecting fringes.  A picture is worth a thousand words, here is what I mean.


My thumb is placed where the seam should be sewn.  Those vertical fringes are in the way.
My solution to this problem was to snip/remove a few of the intersecting fringes.  I decided that a few fringes would not be missed once all was sewn together and the rows were brushed into fluffy goodness.  (Yes, I used a plastic brush to make my fringes fluffy.)

Here is the final product.

Front

Another view of front
And paper-pieced label makes it complete

Back view


QUESTION:  Was the AccuQuilt Machine and  8-1/2 inch Die Cutter worth the expense of purchase?
ANSWER:      The cost can be prohibitive for many and might not compensate for the resulting    
                        finished product in this case.  

QUESTION:  Will I save time and effort?
 ANSWER:     Yes, overall time spent was much less because there was no "snipping" needed.
                        Yes, the process was more efficient once I learned how to deal with the errant fringes  
                        and intersecting rows of fringes.

CONCLUSION:   The AccuQuilt cutting machine produced perfectly cut squares with beautifully,
                               symmetric and long, lovely fringes that could never be produced by hand cutting.
                               The resulting product was well worth using the AccuQuilt cutting machine and its
                               8-1/2 inch die.
                             
                               If you can afford the cutting machine, buy it!  Later you can purchase additional
                               dies for making perfect half-square triangles, squares, strips, circles, etc., in the
                               most  commonly used sizes for making quilts.